With your JamJo website, it’s simple to add images to your content. Images can be used in your posts and pages directly.
BEFORE YOU START
We recommend you read the “Writing a Post” tutorial before continuing. We also recommend that you have an image ready that you would like to add to a post. See “Preparing an image for the web” tutorial.
STEP 1
Go to Posts -> Add New and create a new post. Add your title, categories and any other information as needed. See “Writing a Post”

Start by adding a new post
STEP 2
Directly below your post you will see the option “Canvas Custom Settings”. Click the “upload button”.

Below your post look “Image Upload” button
STEP 3
The “Add media” screen will appear. Click the “Select Files” button.
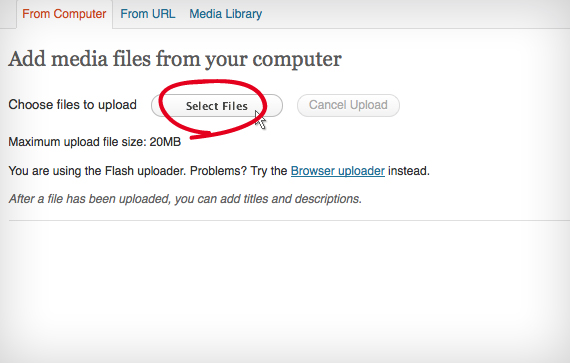
Find the image that you would like to add to your post
STEP 4
Locate the image on your computer and select it. The image will start uploading or “crunching”.
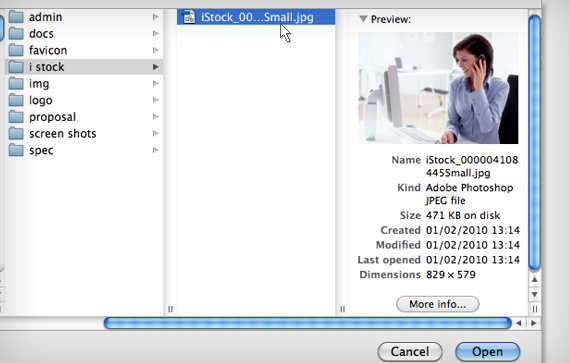
When you have located the image click “Open”
STEP 5
With your image uploaded you should now have a preview of it as in the example below.
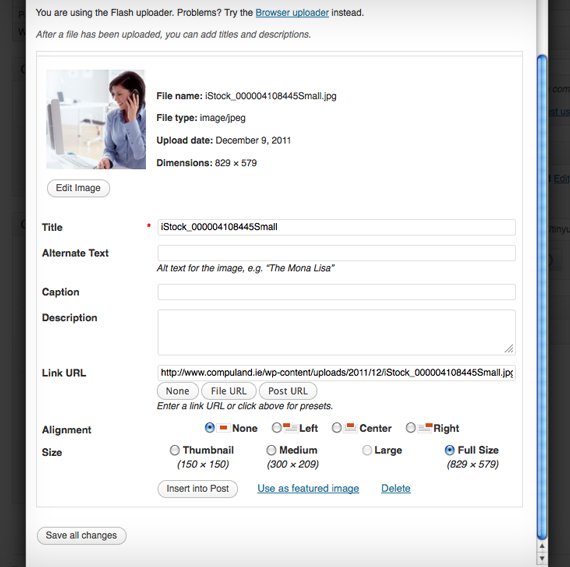
Start filling in the blanks
STEP 6
Start filling in the blanks. A brief explanation of each field is below. When you are done click “Insert into post”.
(NB: IF YOUR SITE IS USING A MOBILE THEME: Before you click “Insert into post”, click “Use as featured image”).
Preview your site live and you will now see your image with your post. Your image will automatically be re-sized and aligned for you. If you wish to add further images within your text or have further control of images in posts and pages see “Images in posts (Manual)” tutorial.
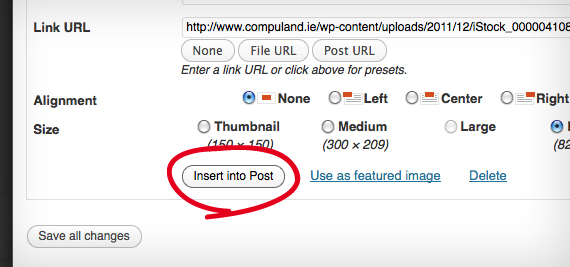
You’re are almost there!
EXPLANATIONS
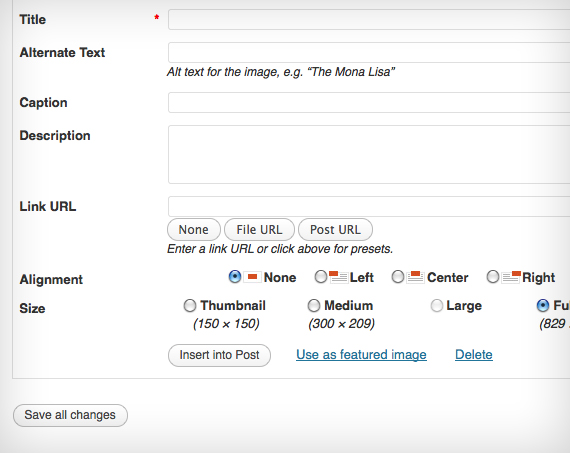
What do these mean?
Title – Text displayed as a tooltip (when a mouse is hovered over the image)Also see “SEO For beginners” tutorial
Caption – Image caption displayed directly underneath the image (will also serve as the alternate text.)
Description – Text displayed with the image in your dashboard and attachment pages on your blog. Also see “SEO For beginners” tutorial
Link URL / Link Image to: – The URL/web address to which the image will be linked. Click the File URL button to link the image to its original, full-size version. Click the Post URL button to have the image linked to its attachment page.
Alignment – (not applicable to automatic image upload)
Size – (not applicable to automatic image upload)
